Setting goals is a helpful tool for staying motivated and consistent in your training. In this article, we’ll explore StrengthLog’s goal feature.
You are able to create 9 different types of goals:
- Reps
- Volume
- Sets
- Number of workouts
- Personal record (PR)
- Estimated 1RM
- Time PR
- Rep goal
- Body measurement
1–3: How to Set Up a Reps/Volume/Sets Goal
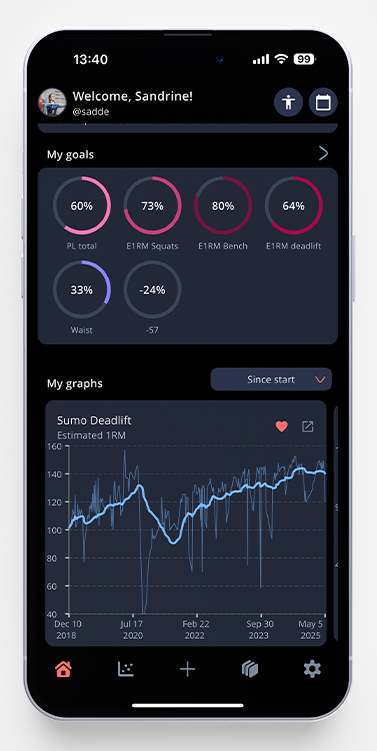
- On the home page, scroll to My goals and tap the small arrow next to the text.
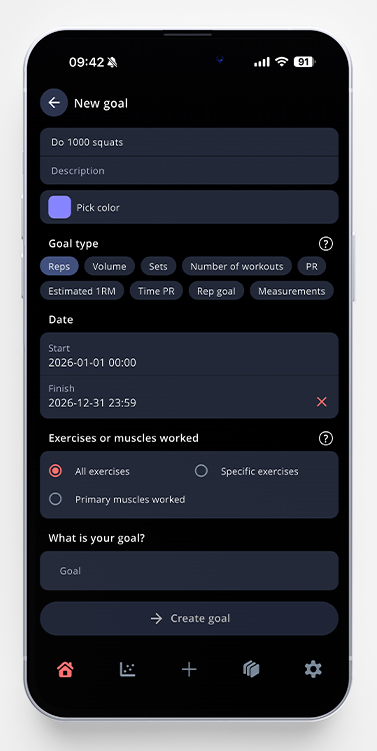
- Tap the green plus sign in the upper right corner, and choose to create a new goal.
- Choose a title, description, and color for your goal. In our example below, I’ve chosen the goal to do 1.000 reps in any variation of squats under 2026.
- Choose reps, volume, or sets as a variable and put in the correct start and end dates. If you don’t pick an end date, the goal will continue until you reach it.
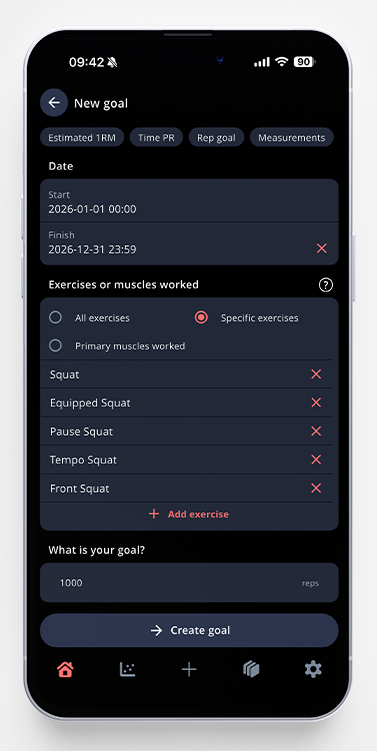
- To add all variations of squats that you want to include, tap Select exercises and search for the exercises you want to include, and tap the plus sign next to them. When you’ve added all of them, tap the arrow in the bottom right corner. Of course, you can create goals that include all exercises as well, or if you want all exercises for a certain muscle group.
- Type the total amount of reps or sets in the field under What is your goal? If you choose volume instead of reps or sets, the variable will be kg/lb instead.
- Tap Create goal and you’re done! You will now be able to follow your progress in real-time.
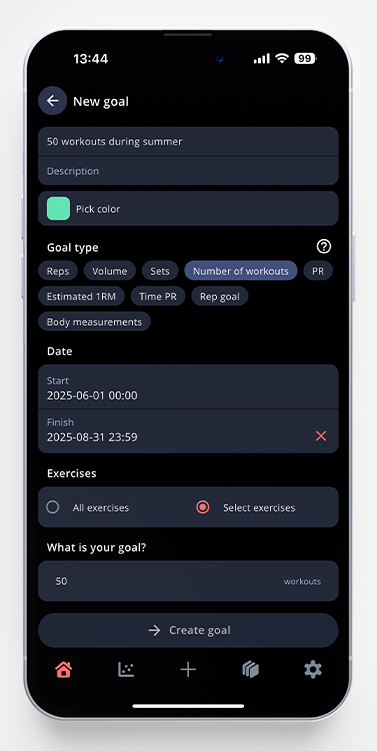
4: Number of Workouts
- On the home page, scroll to My goals and tap the small arrow next to the text.
- Tap the green plus sign in the upper right corner, and choose to create a new goal.
- Choose a title, description, and color for your goal. In our example below, I’ve chosen the goal to finish 50 workouts from June to August.
- Choose Number of workouts as a variable and put in the correct start and end dates. If you don’t pick an end date, the goal will continue until you reach it.
- Make sure ”All exercises” is selected.
- Type the total amount of workouts in the field under What is your goal?
- Tap Create goal and you’re done! You will now be able to follow your progress in real-time.
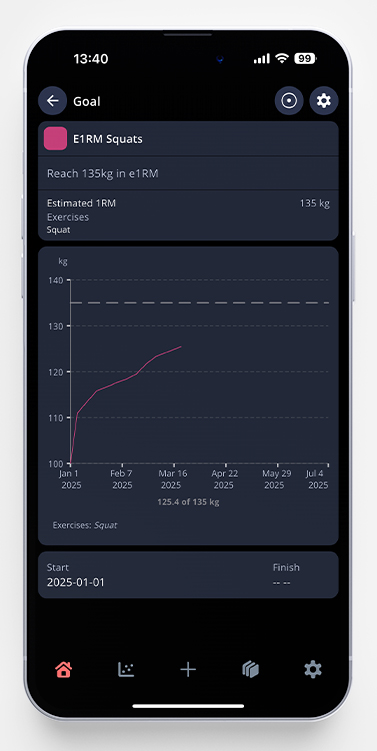
5-6. Personal Record (PR) and Estimated 1RM
- On the home page, scroll to My goals and tap the small arrow next to the text.
- Tap the green plus sign in the upper right corner, and choose to create a new goal.
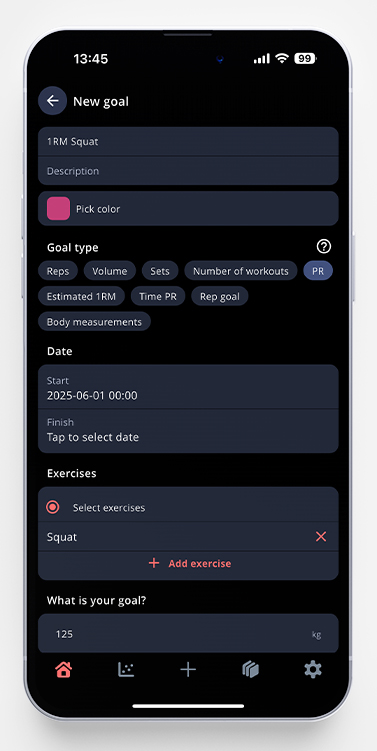
- Choose a title, description, and color for your goal. In our example below, I’ve chosen the goal of increasing my 1RM in squat.
- Choose PR or Estimated 1RM as a variable and put in the correct start and end dates. If you don’t pick an end date, the goal will continue until you reach it.
- Choose the preferred exercise you want to set your PR/E1RM in. This will be squat in my example.
- Type your goal weight in the field under What is your goal?
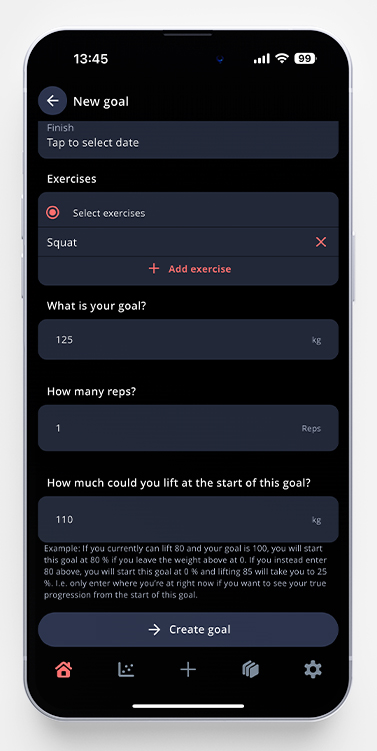
- In this example, I’ve chosen to reach for a 1RM-goal, but you can choose another amount of reps as well if you’re aiming for a PR-goal. In Estimated 1RM, it’s calculated regardless of reps, so this option isn’t available while creating that goal type.
- You can fill in your current PR/Estimated 1RM, i.e. how much you can lift, at the start of the goal – when you want to track your actual progress from the start of this goal. In my example below, I’ve noted 110 kg. This means that if I haven’t squatted a rep over 110 kg yet, my progress will be at 0 %. If I instead enter 0 kg in that field, the app will track the progress from 0 kg, instead of my actual starting point.
- Tap Create goal and you’re done! You will now be able to follow your progress in real-time.
7. Time PR
- On the home page, scroll to My goals and tap the small arrow next to the text.
- Tap the green plus sign in the upper right corner, and choose to create a new goal.
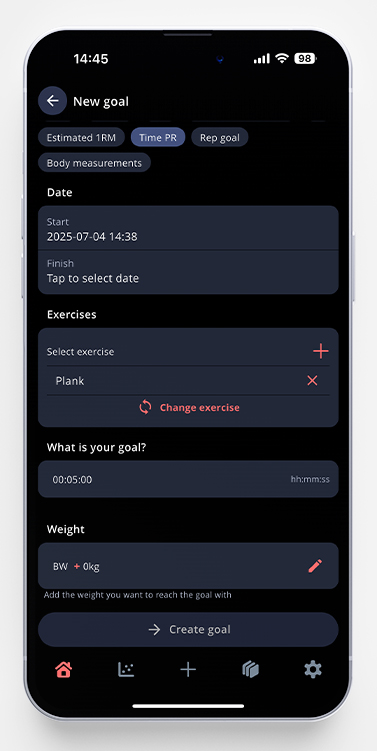
- Choose a title, description, and color for your goal. In our example below, I’ve chosen to go for a new PR in the plank
- Choose Time PR as a variable and put in the correct start and end dates. If you don’t pick an end date, the goal will continue until you reach it.
- Choose the preferred exercise you want to set your PR in. This will be the plank in my example.
- Type your goal time in the field under What is your goal?
- You can fill in the weight you want to reach the goal at, in this example, I’ll keep it at my bodyweight.
- Tap Create goal and you’re done! You will now be able to follow your progress in real-time.
8. Rep Goal
- On the home page, scroll to My goals and tap the small arrow next to the text.
- Tap the green plus sign in the upper right corner, and choose to create a new goal.
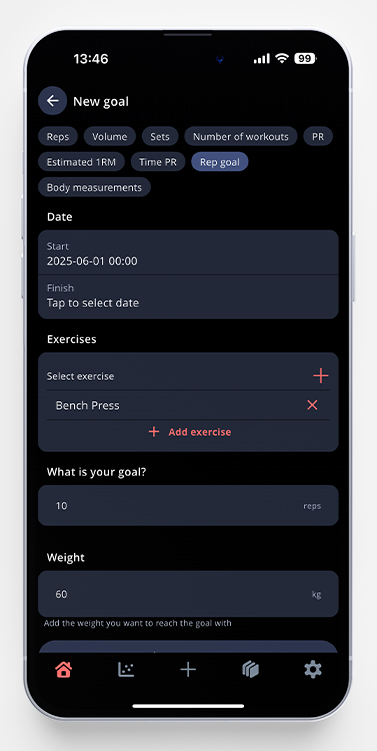
- Choose a title, description, and color for your goal. In our example below, I’ve chosen to go for a new Rep goal in the bench press
- Choose Rep goal as a variable and put in the correct start and end dates. If you don’t pick an end date, the goal will continue until you reach it.
- Choose the preferred exercise you want to set your goal in. This will be bench press in my example.
- Type your target reps in the field under What is your goal?
- Pick which weight you want to reach your goal at. In my example, I’ve chosen 60kg.
- Tap Create goal and you’re done! You will now be able to follow your progress in real-time.
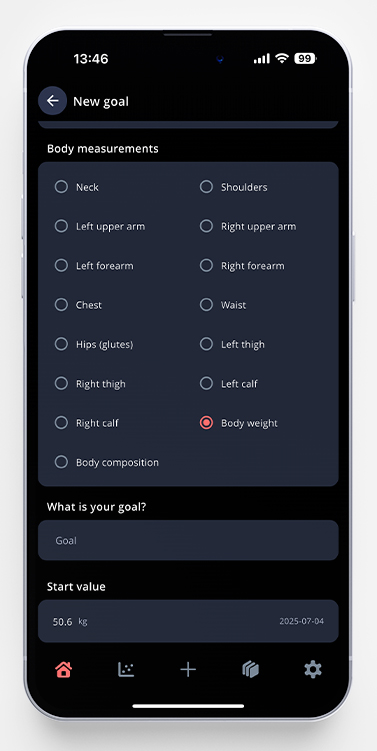
9. Body Measurement
- On the home page, scroll to My goals and tap the small arrow next to the text.
- Tap the green plus sign in the upper right corner, and choose to create a new goal.
- Choose a title, description, and color for your goal.
- Choose Body Measurement as a variable and put in the correct start and end dates. If you don’t pick an end date, the goal will continue until you reach it.
- Choose which body measurement you want to use for your goal. In my example, I’ve chosen body weight.
- Type your goal weight/measurement in the field under What is your goal?
- Regarding the other goals, this ones fetches your starting point from your logged body measurement. If you haven’t logged any yet, the app will ask you to do so before you can save the goal.
- Tap Create goal and you’re done! You will now be able to follow your progress in real-time.
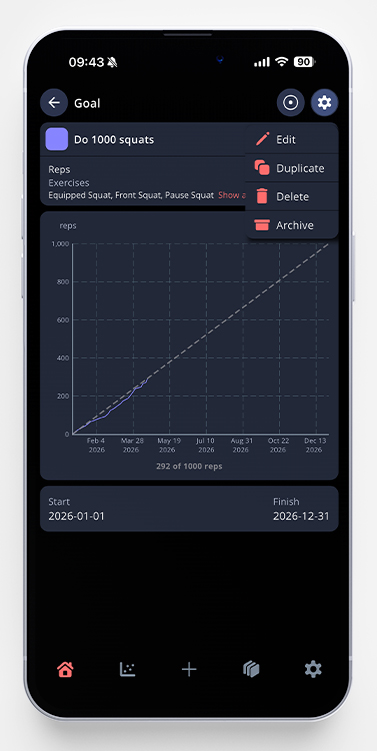
How to Edit or Delete a Goal
In one of my examples above, I made a goal for my squat variations. But what if I realise that I missed an exercise? Just go to the overview of said goal, tap the small gear icon and choose Edit. From here, you can change the name, description, dates, exercises and even the target of the goal. When you’re done, just tap Save goal at the bottom of the screen.
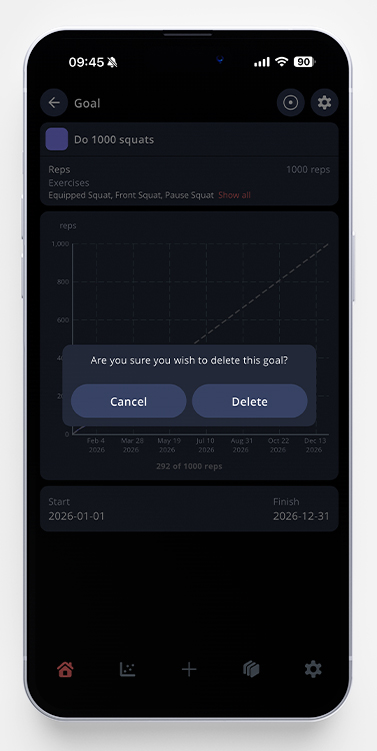
If you feel like you’re done with a goal, you can choose between deleting, or archive it. Just go to the overview of said goal, tap the small gear icon and choose what you want to do.
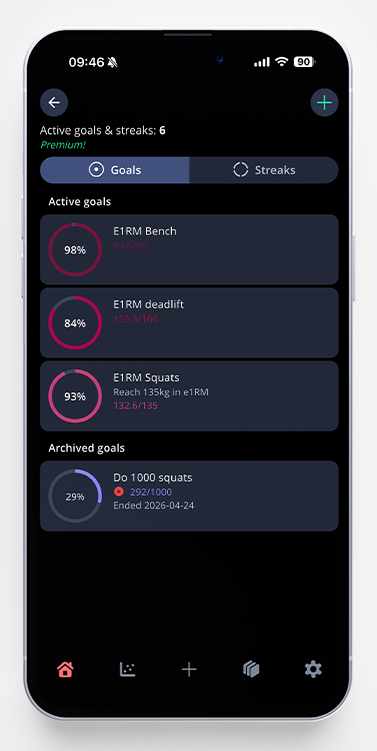
If you delete it, it will disappear from the app. If you choose to archive it, you’ll still be able to find it on the goals page in the app, but the goal isn’t active anymore and you can’t edit any details about it.