
We have over 600 exercises in our exercise library, and are constantly trying to add more relevant exercises for you to try out. However, we understand that it can be overwhelming to scroll through an endless list of exercises. So, let’s do a short deep dive in how to find and add exercises to your workout.
We have an article on how to record a workout from start to finish, you’ll find it here.
When you first start a workout, and are going to add exercises, you’ll see the most used exercises in our app. Once you’ve used our app for a while, you’ll notice that the most used list adapts to your most used exercises instead of all users.

If you go to “All exercises” instead, you have all exercises in the app in a long list. They are divided into Strength, Cardio and Mobility & Activation. For strength and mobility & activation, they are also divided into which muscles that are being worked.
You have a few filtering options to make it easier to find the exercise you’re looking for.
By tapping the small image of a body, you’ll be able to filter on muscles – without knowing the name of them. Just tap the body part you want to train, and narrow it down until you’ve hit the right category.
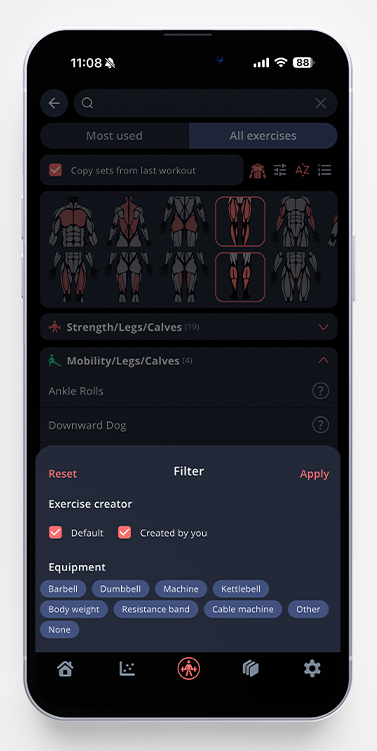
Next to the muscle map icon, you’ll find the ability to filter on our standard exercises and your own (See this article on how to add your own exercises). You are also able to filter on the equipment type, which can be especially useful if you’re working out in a place with limited equipment.
Bonus tip: if you long press on one of the equipment types, all others will be unmarked.
Next to the filter button, you are able to choose if you want to list the exercises in alphabetical order, or from your most used to least used exercise.
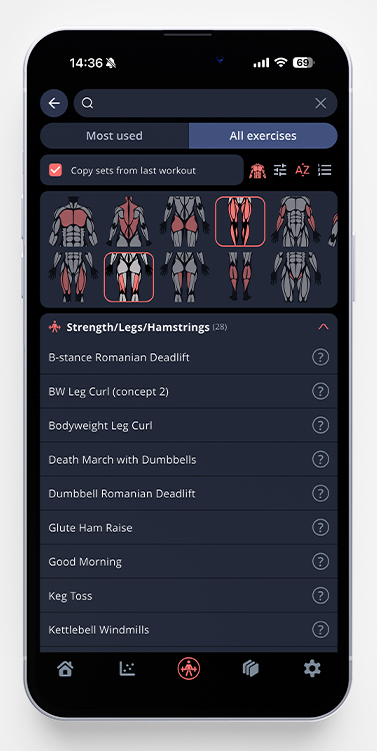
By tapping the question mark next to an exercise, you’ll be able to see a video demonstration of the exercise, read a written instruction, and see a muscle map of which muscles that are being worked. Read more about our exercise descriptions here.