Did you know that you can build your own training programs in StrengthLog? It might look quite complex at first, but let us guide you through it!
But before we start, we want to highlight an alternative to building a program.
If you want to build a program consisting of one week, and then have the app to fetch what you did the last time – Train Again might be a better, and faster, alternative for you. This way you don’t have to build a several week long program, and you can easily fetch an exact copy of your last session.
However, if you want to build a program that’s several weeks, and with a set progression (based of % of 1RM or with a set weight), it’s probably a good idea to construct a program instead. So let’s go through that below!
How to Build a Program From Scratch
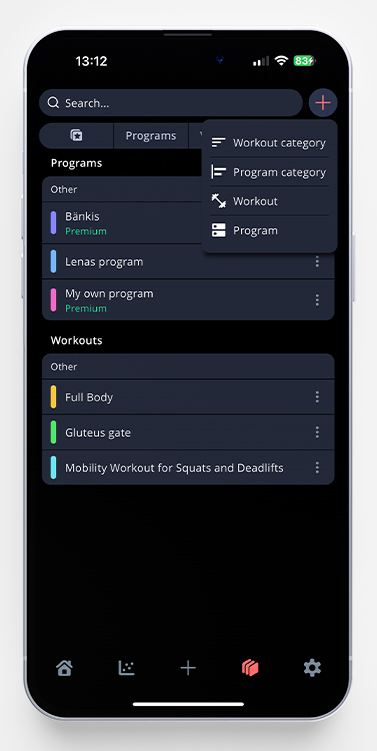
- Go to the Program page, pick Mine and then tap the + sign in the upper right corner. Choose Program.
- Pick Empty program. You can also choose Copy existing program and pick any of StrengthLog’s pre-made programs. After copying, you can make all the changes/modifications to our programs that you want. (Please note that you must have a premium subscription to copy a premium program). Read this article to learn more about this.
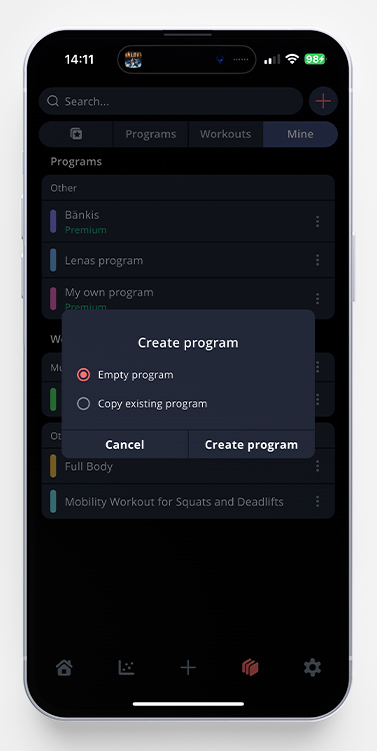
3. Set a name for your new training program, and tap Create program.
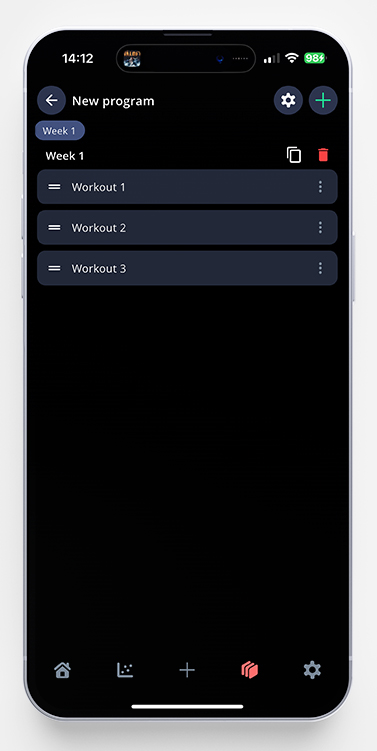
4. Tap the plus sign, and add a week. Fill this week with your preferred number of workouts.
You need to edit one workout at the time, and you’ll build the workouts the same way you build a workout template, or planning a workout for later. Read this article for more details.
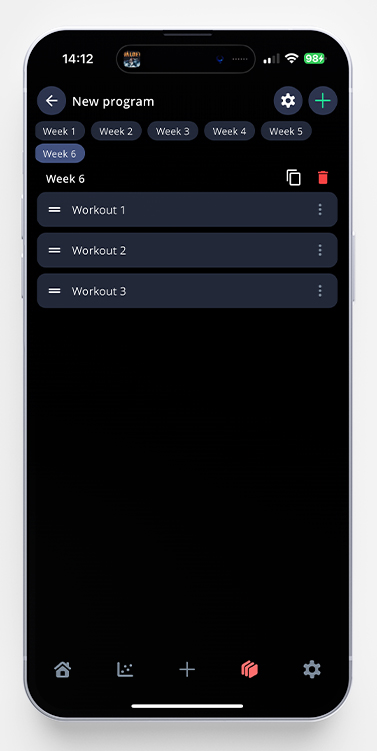
When you’re done with your first week, tap the copy icon next to the headline “Week 1”. A week 2 will be created, and all of your workouts from week 1 will be copied into week 2. The default name of these workouts will be the same as the week that you’ve copied. To edit the workouts, just tap the three dots to the right of it. To change the name of the workout, you just tap the gear icon while you’re editing said workout.
This way, you can simply edit each new session and make your desired changes from one week to the next instead of creating every workout/week from scratch. When you’re done with week two, just copy that one to create week three, etc.
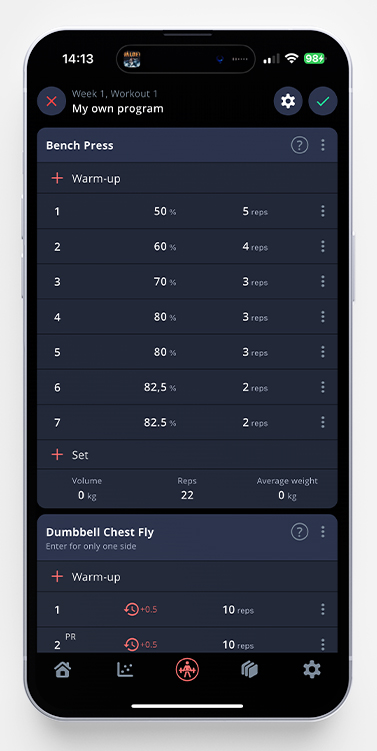
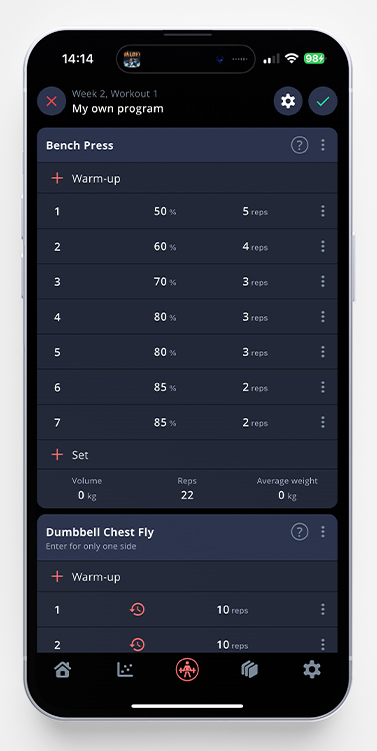
In my example below, I’ve chosen to build a program focusing on Bench Press, with three workouts/week. My main exercise will therefore be Bench Press, which I choose to program with help of % of 1RM. (This is a premium function). With the other exercises, I’ll leave them to be programmed with Retrieve from log (read more about that function in this article). You are also able to program with RPE/RIR (if you have a premium subscription) – see more about that function here.
As you can see, I’ve changed the top sets in week 2 from 82,5% to 85%, but the sets leading up to them remain the same.
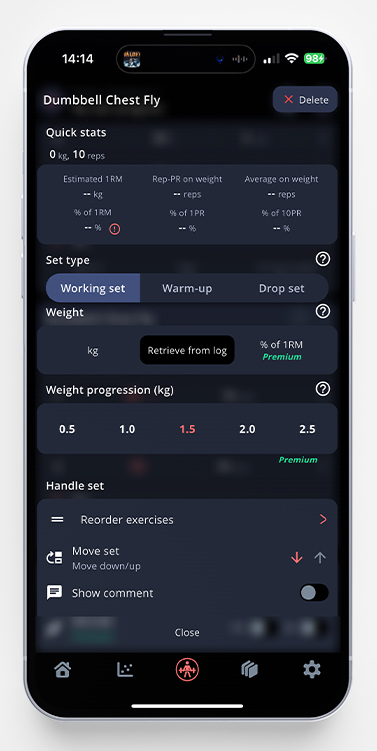
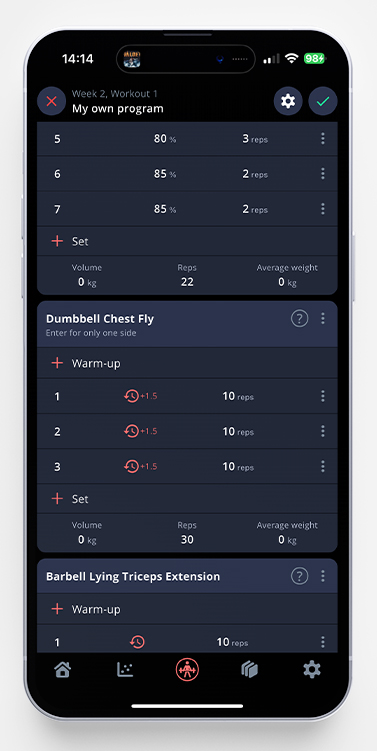
Another way to add progression to your program is by using “Retrieve from log” combined with an automatic progression. This is a premium feature. By choosing this, the app will fetch the weight from your last session and add a set weight to that number (in my example below, 1.5kg).
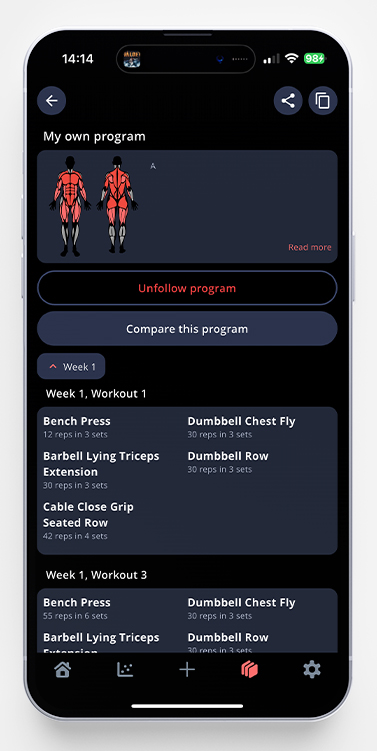
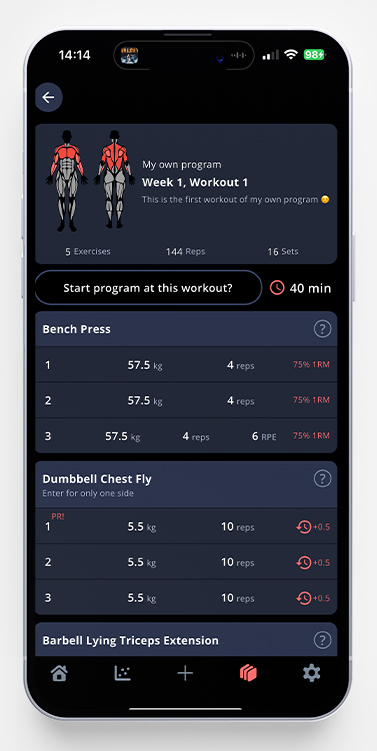
When you’re done with your program, you can exit the edit mode by tapping the backward arrow, and see the overview of the program. By clicking on one of the workouts, you’ll get a detailed overview of that workout.
Other Good Things to Know
- You are only able to edit one workout at a time. If you have an ongoing edit, you won’t be able to start a new workout or edit another one.
- If you want to move workouts around, tap and hold on to the two lines to the left of a workout, then drag and drop the workout to where you want it.
- If you want to delete a whole week, all the workouts in it will also be deleted.
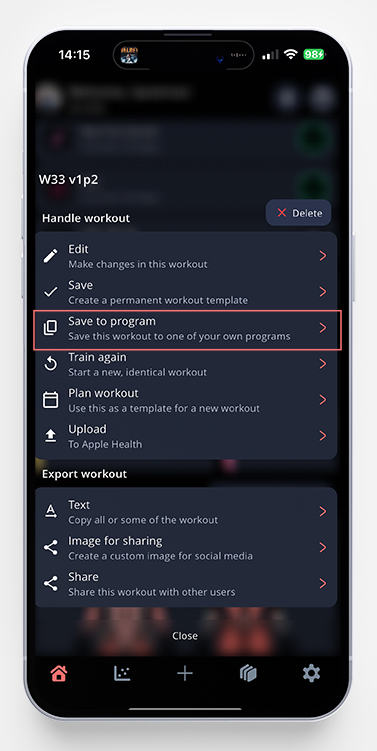
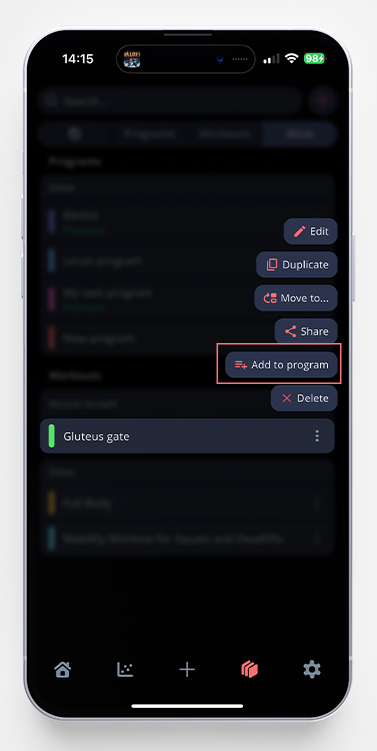
- If you want to add a workout that you previously made as a workout template into one of your programs, go to your program/workout page, find the workout you want to add to a program, and tap the three dots. Pick Add to program. Next, choose the program to which you want to add it to, and press Save. You can do the same with a workout from your traning log, just go to that workout, tap the three dots, and choose Save to program.

Comments are closed.